

With our CI integration to GitHub you can automatically upload your latest commits and pull requests to Debricked.
There are currently two ways of integrating your projects with Debricked:
-
GitHub Actions
-
GitHub App
GitHub Actions
Configure Debricked token
Start by generating an access token. Copy the token so that you can use it in the next step.
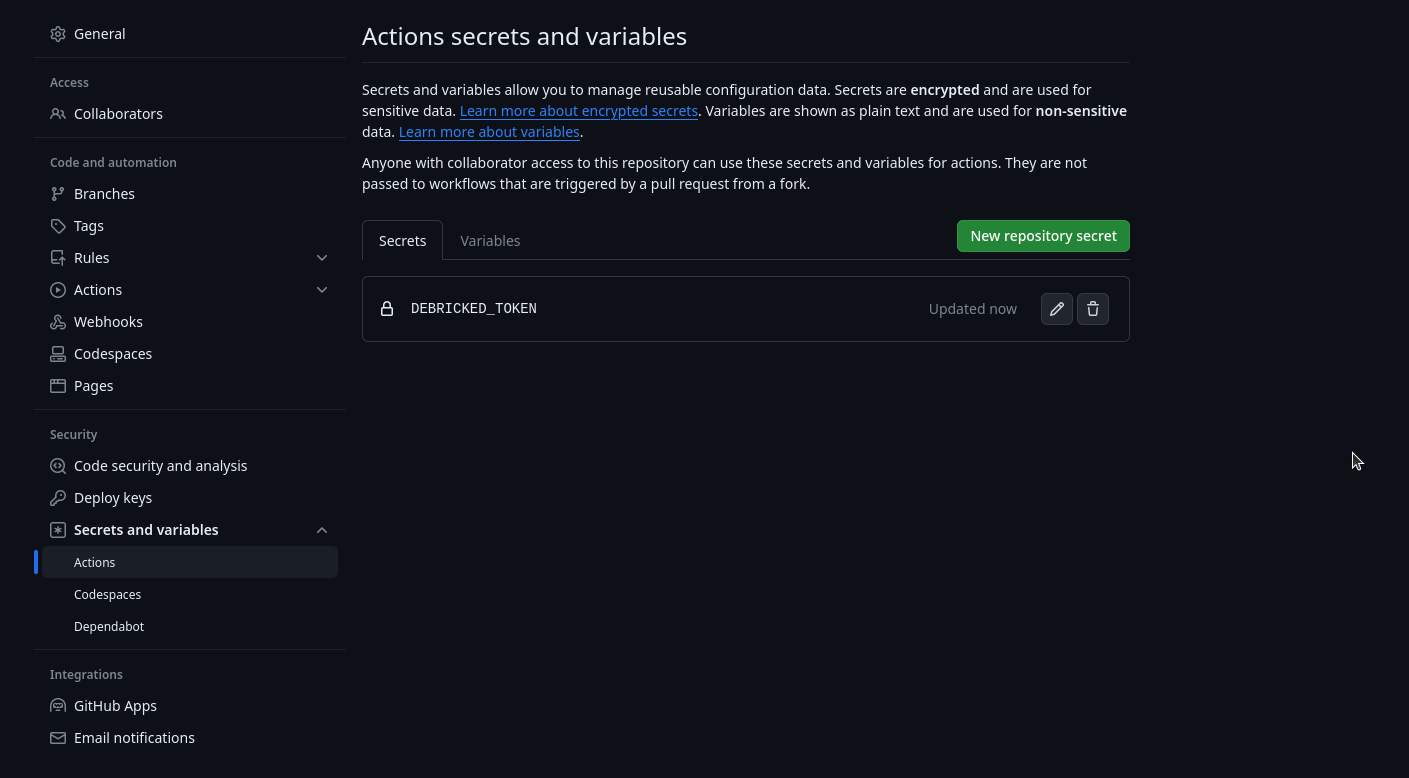
You can add your access token as a secret, called DEBRICKED_TOKEN, under Settings → Secrets and variables → Actions in your repository.
Integrate a single repository
You can scan your repositories as part of your CI pipeline by using the GitHub action: https://github.com/debricked/actions
Depending on what package manager you are using there are different job setups.
In order for us to analyze all dependencies in your project, their versions, and relations, files containing the resolved dependency trees have to be created prior to scanning. Those depend on the package manager used. If files are lacking we try to generate them on our side, which can negatively affect speed and accuracy.
Example 1: If npm is used in your project you will have a package.json file, but in order for us to scan all your dependencies we need either package-lock.json or yarn.lock as well.
Example 2: If Maven is used in your project you will have a pom.xml file, but in order for us to resolve all your dependencies we need a second file, as Maven does not offer a lock file system. Instead, Maven dependency:tree plugin can be used to create a file called .debricked-maven-dependencies.tgf.
- Create a .github/workflows/debricked.yml file and put in the contents of the template
- Commit your changes to .github/workflows/debricked.yml and watch the pipeline run!
Integrate multiple repositories
Integrating many repositories with one workflow using GitHub can greatly simplify the process of managing and deploying code across multiple projects. You can set this up with required workflows set up in an organization ruleset, which triggers for every pull request and blocks the merge if the pipeline fails.
Considerations:
- Organization Rulesets are only available with GitHub Enterprise
- GitHub Actions must be enabled for a repository in the organization's settings in order for required workflows to run
- Ruleset workflows only work with the
pull_requestormerge_groupevents - Ruleset workflows and workflows from a specific repository are not mutually exclusive. If you use a required workflow and configure GitHub Actions for a specific repository, they will both run.
Step 1: Create an organization secret
To avoid having to add the DEBRICKED_TOKEN to every integrated repository, it is possible to share the Debricked token between repositories in your organisation. In order to enable this, you need to create an organization secret:
- Generate a Debricked access token
- Go to organization Settings → Secrets and variables → Actions
- Click on New organization secret
- Add your token from 1. to a variable called
DEBRICKED_TOKEN
Step 2: Create repository for the shared workflow
Set up a repository within your workspace for the shared workflow:
- Create a new repository in your workspace or enter an already existing one
- Create a workflow yaml file and paste the Debricked workflow template contents
- Change line 3 from
on: [push]toon: [pull_request]for it to be able to run as a required workflow
Step 3: Configure ruleset
-
Visit the settings page of your organization by clicking your avatar in the top right of the GitHub UI, select Your organizations and then the Settings button for the organization
-
Under Code, planning, and automation go to Repository→ Repository Rulesets
-
Click New branch ruleset or select an already existing ruleset
-
In Enforcement status dropdown select: Active if you would like to enforce the rules from the start, or Evaluate if you would like to test it first
-
In Target repositories section, select which repositories and branches the ruleset should be enforced for. We recommend starting out with either the default branches or including by pattern. If not, you have to set up bypassing roles or teams, to avoid situations where all branch actions in the repository get blocked
-
in Branch protections tick Require workflows to pass before merging
-
Click the Add workflow button
-
Select imported repository and branch from the dropdown lists and workflow from that repository in the modal window
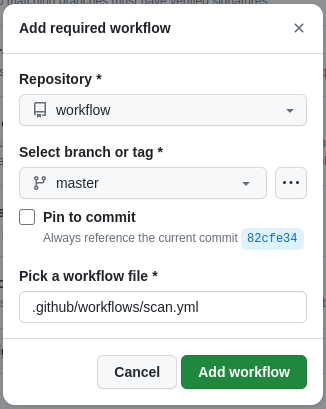
-
After these steps the workflow should be executed for pull request events in the selected repositories and branches
GitHub App
Installation
-
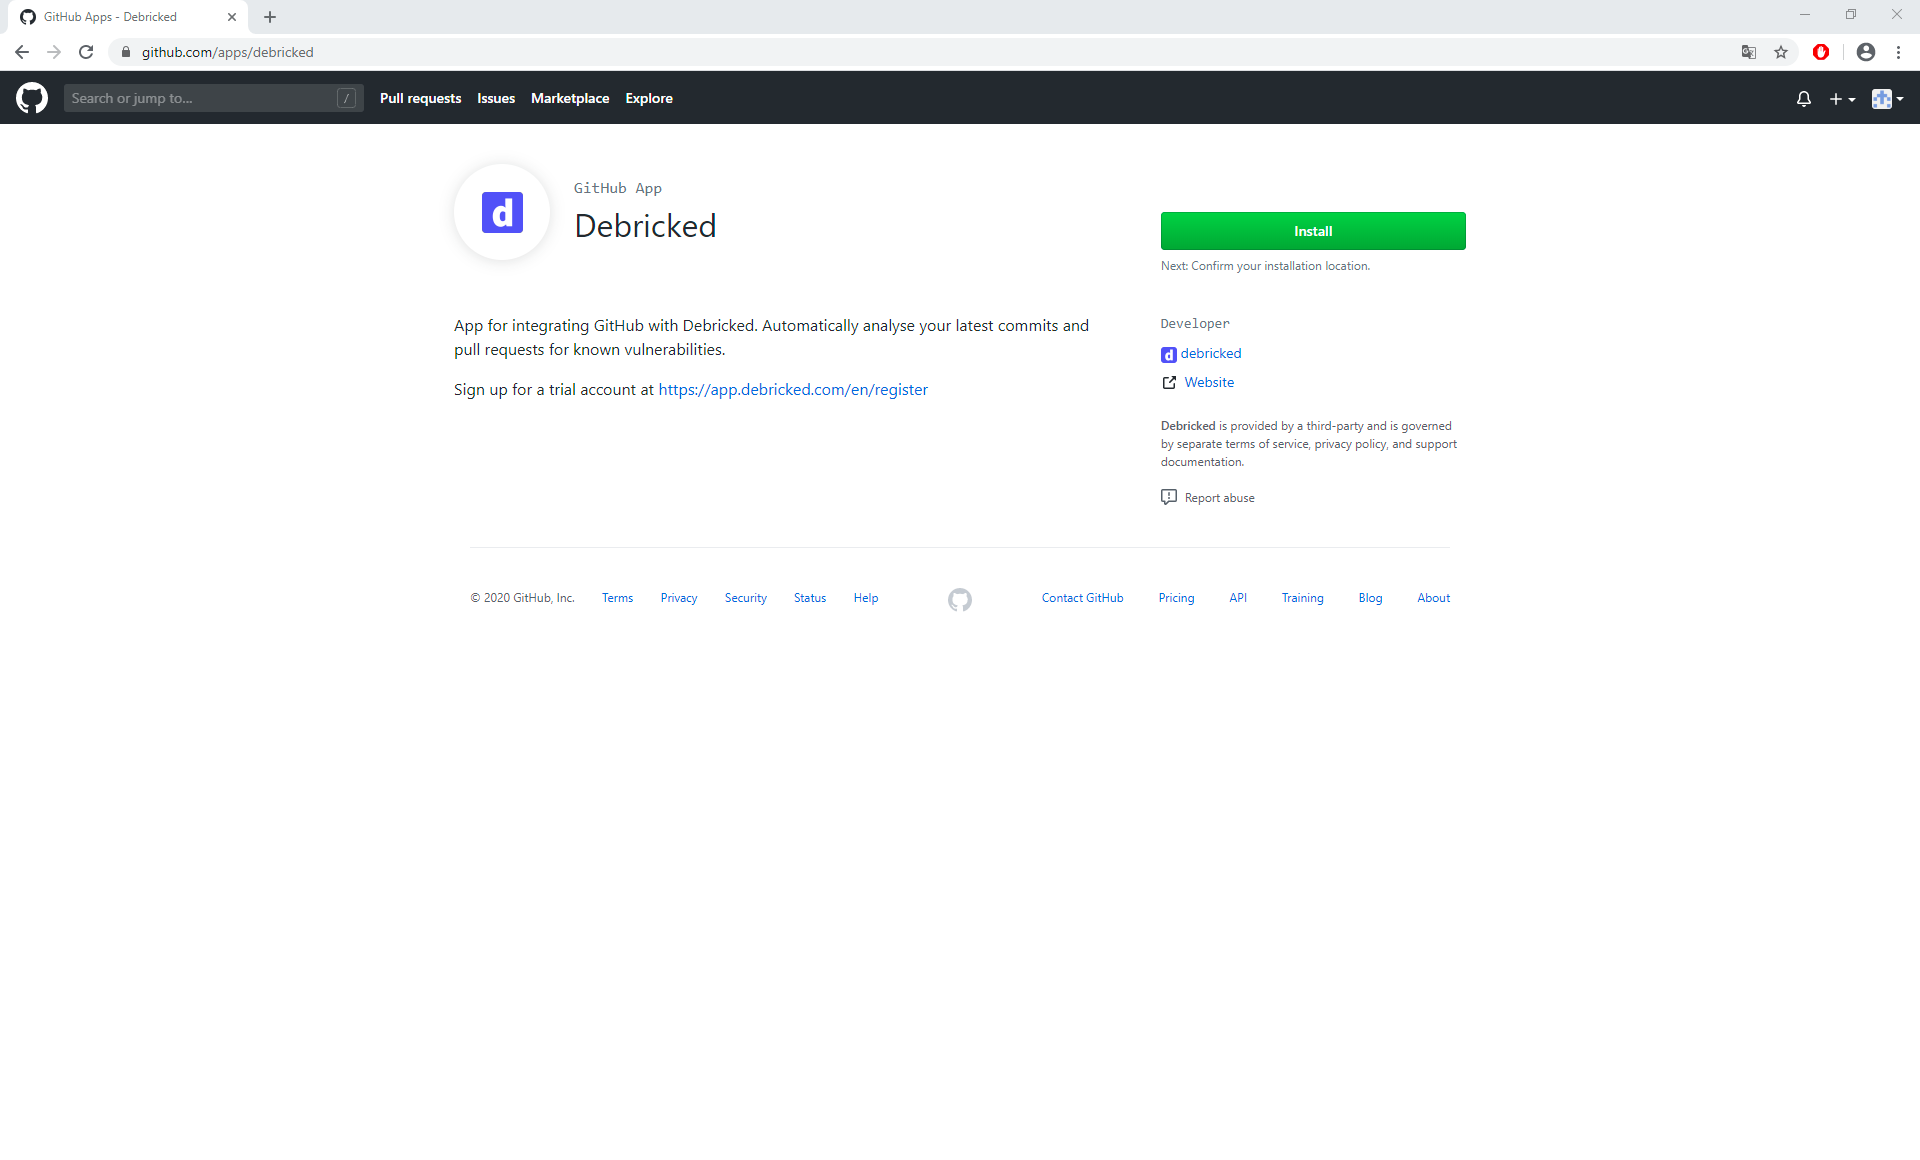
Start by heading over to https://github.com/apps/debricked/.
-
Click on install button in the top right corner
-
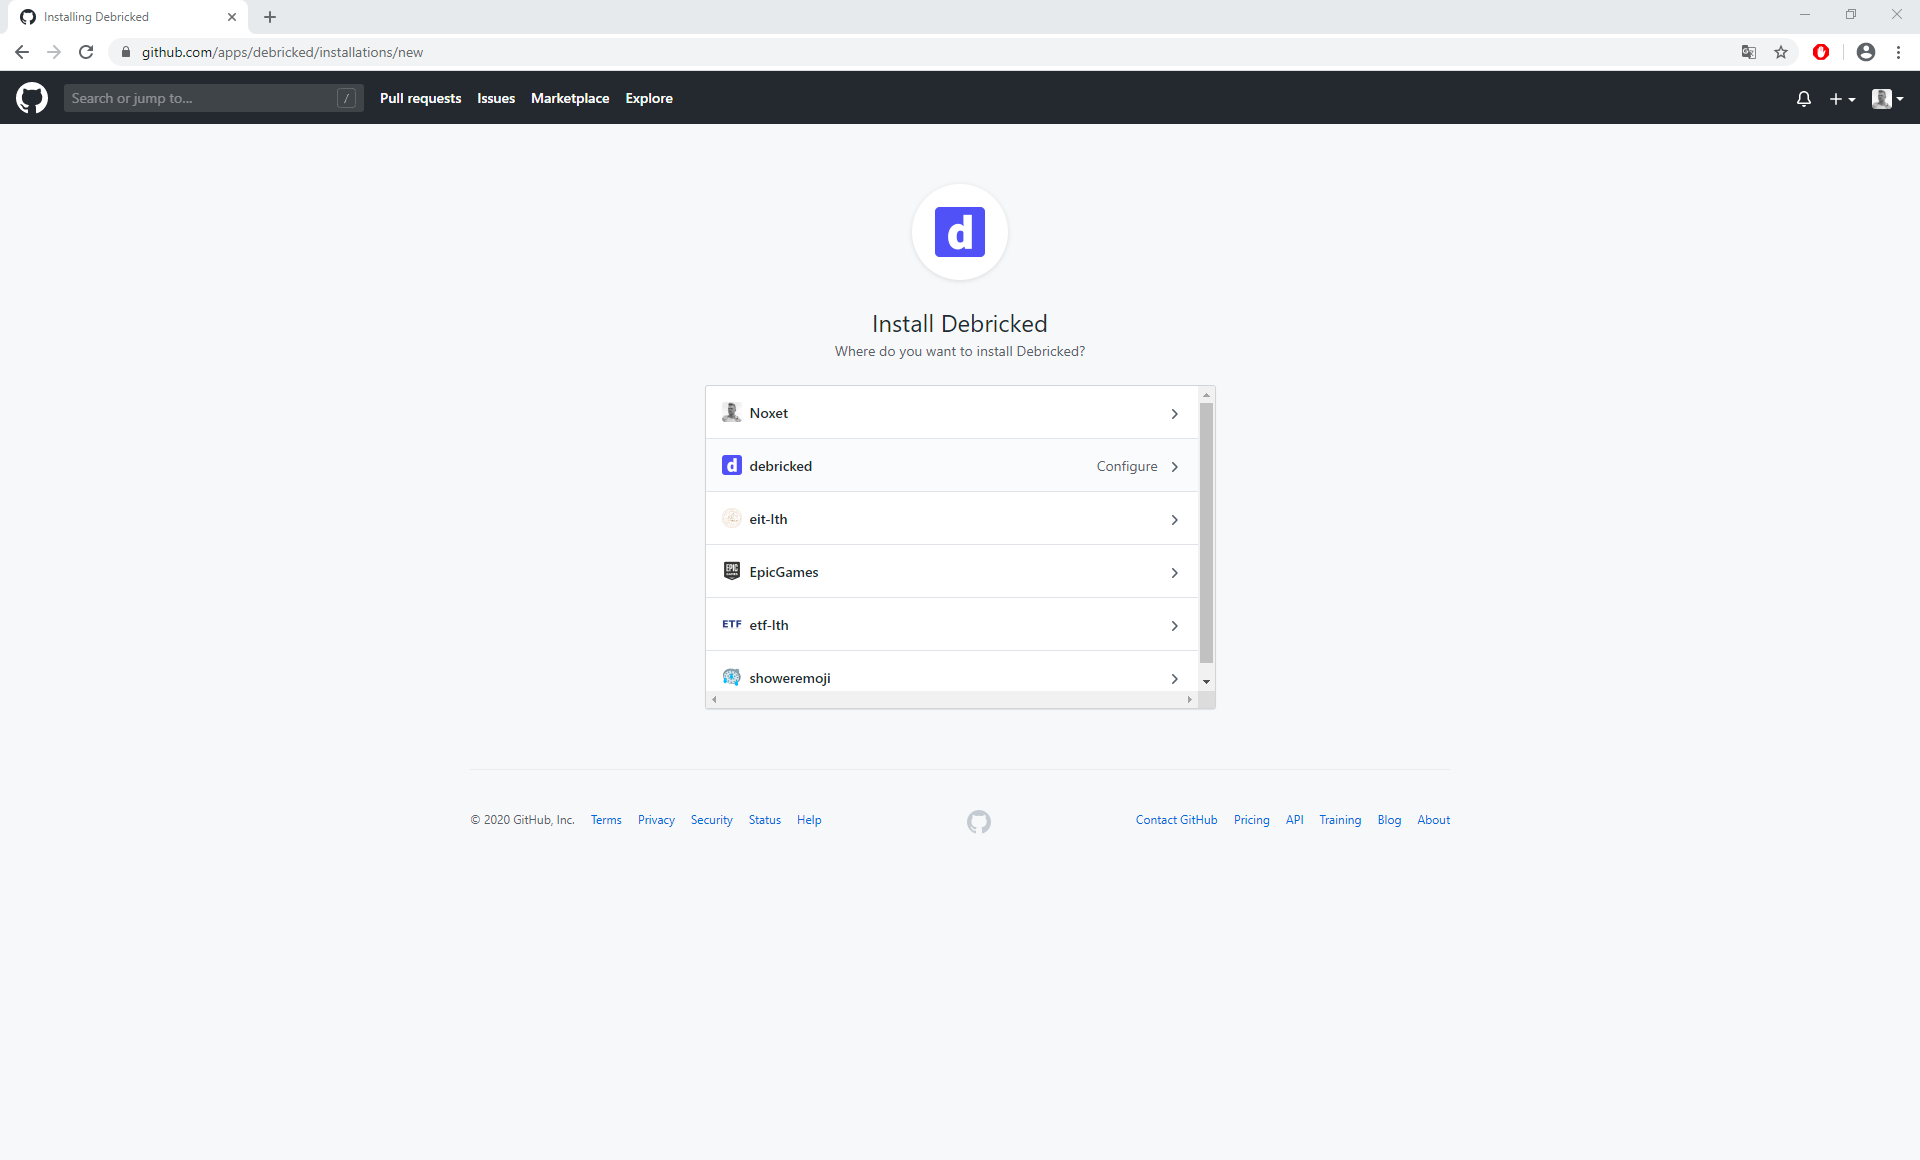
Choose your personal account or your organisation’s account
-
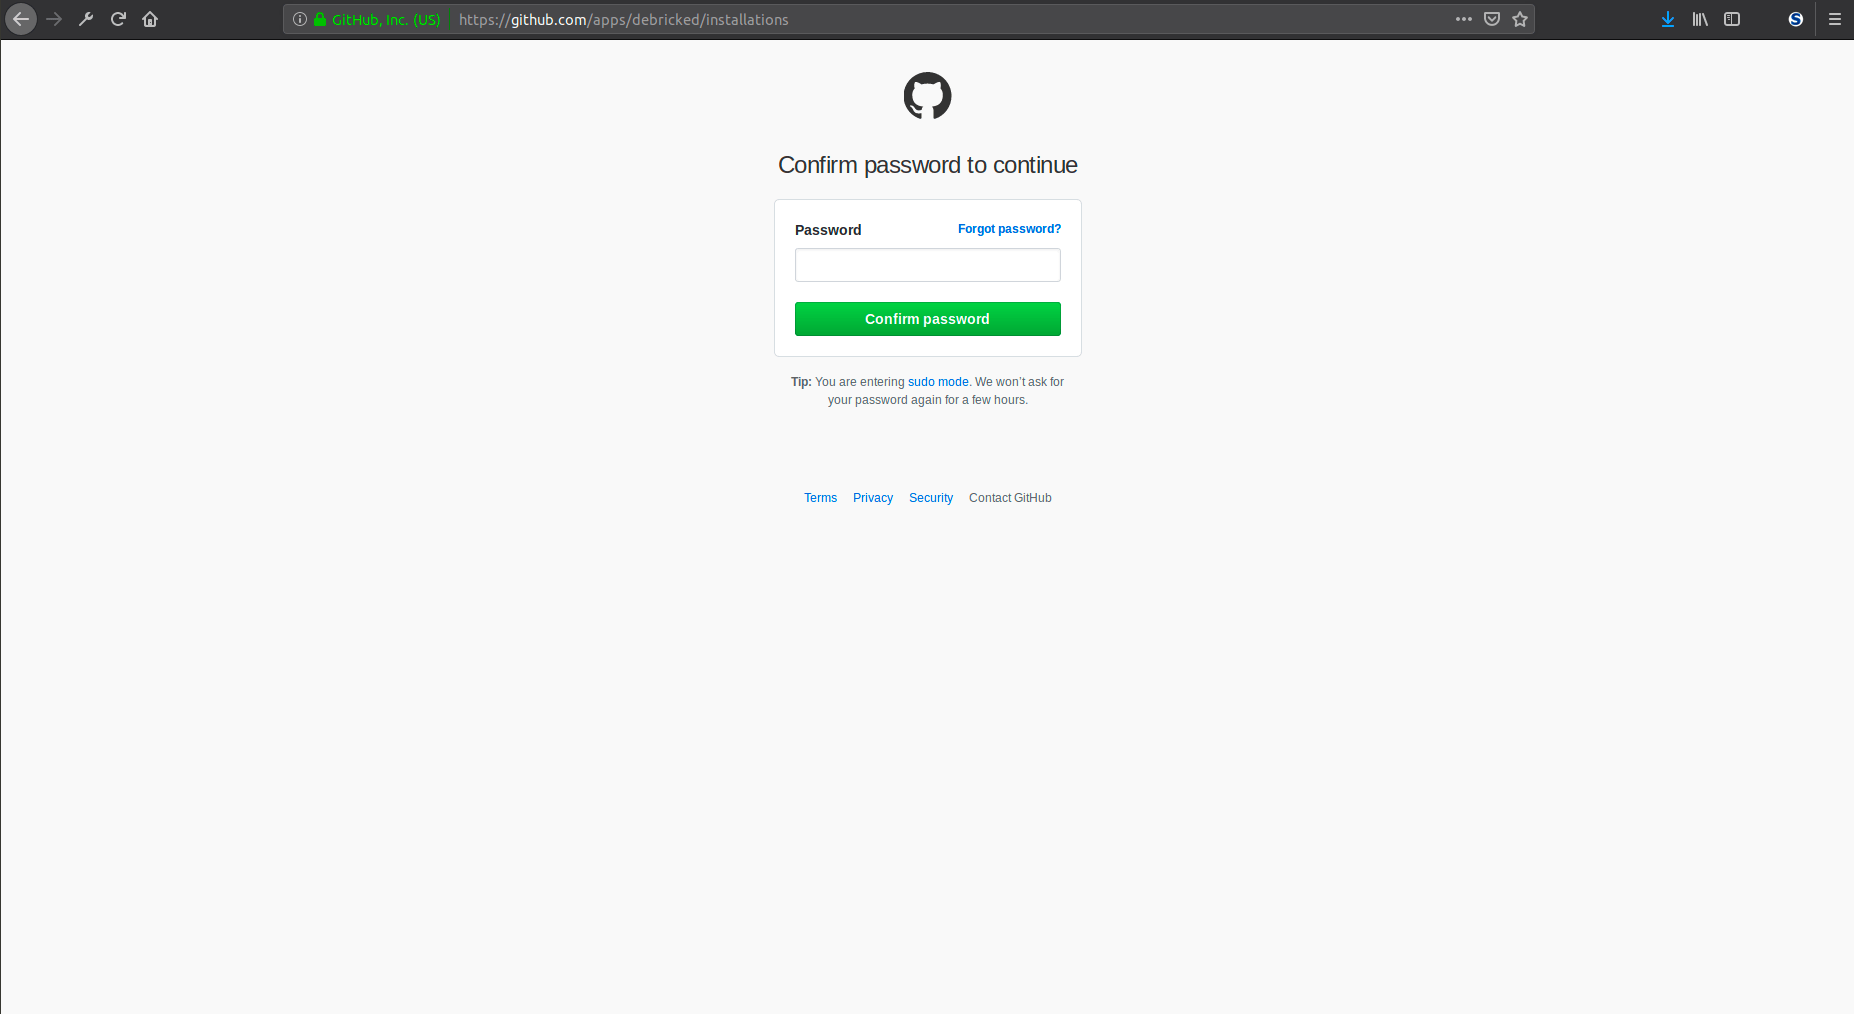
If you haven’t entered your password in a while you might be have to re-enter your personal account password
-
Install directly or request access to install:
-
- If installing to a personal account or an organisation account where you are an admin, you will be able to select which repositories to install the integration to
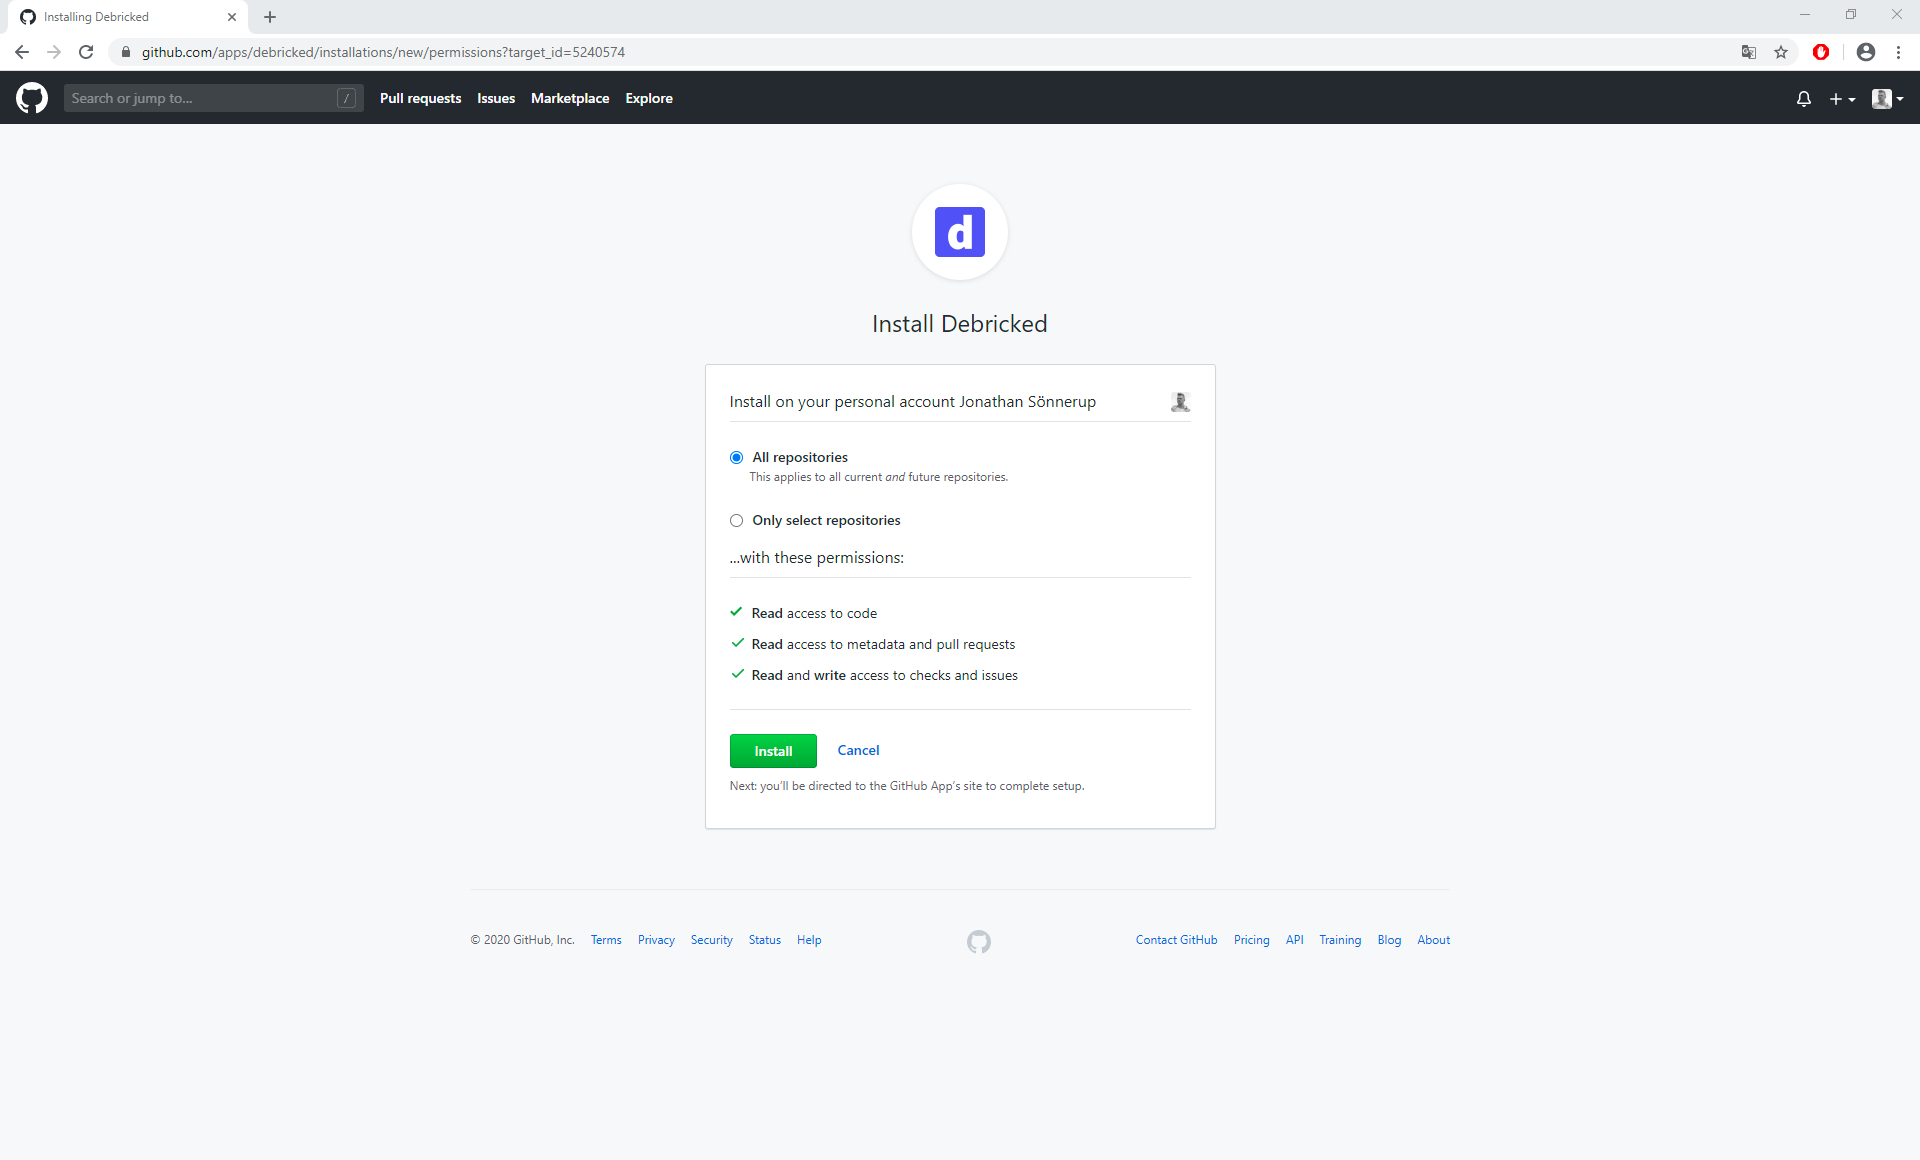
- If you don’t have the admin permissions, you will still be able to select which repositories to install the integration to, but an organisation admin will have to approve your installation request
- If installing to a personal account or an organisation account where you are an admin, you will be able to select which repositories to install the integration to
-
If the installation is successful, you or your organisation admin will be redirected to Debricked’s service settings, where pop-up will be shown letting you trigger a first time scan of your repositories
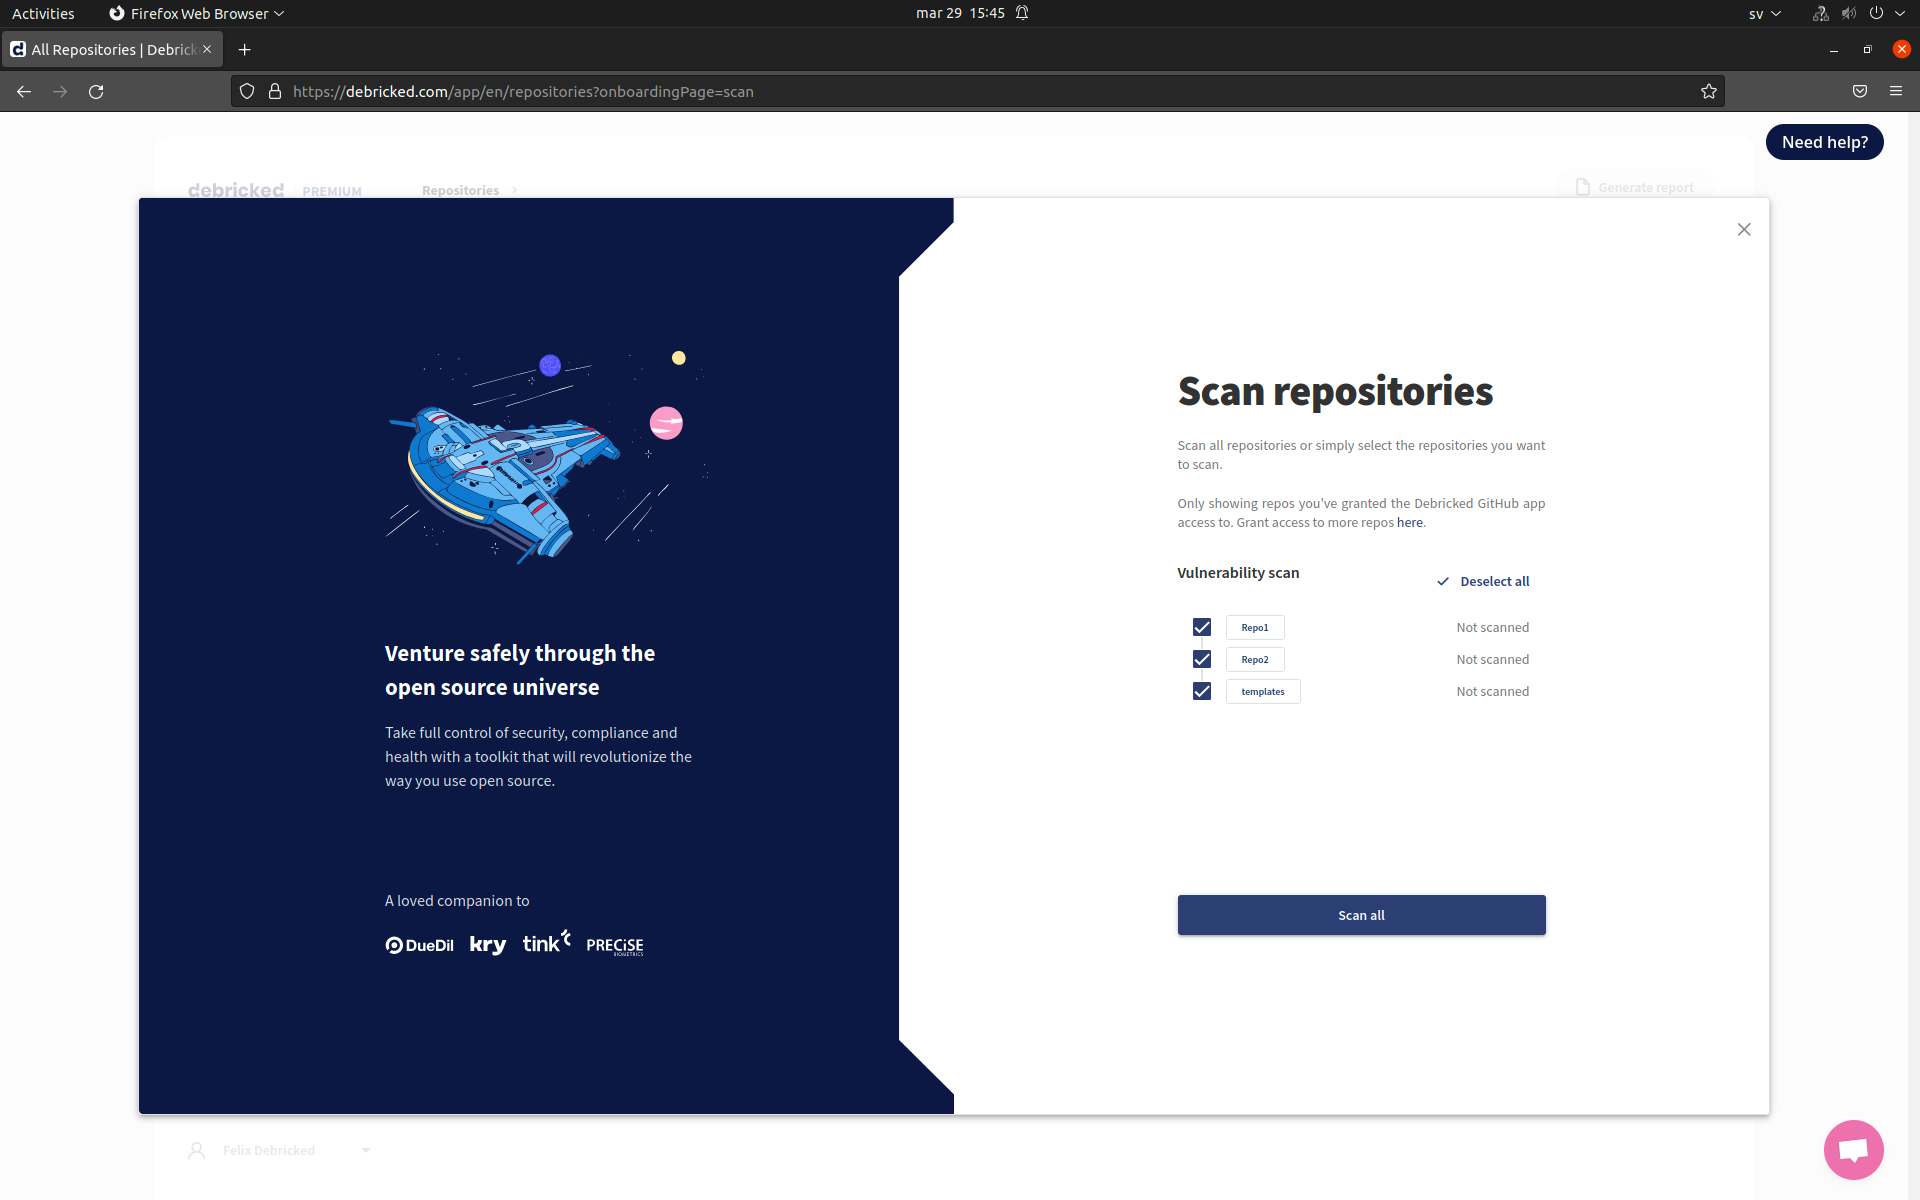
Repositories not selected during the first scan will not be scanned initially. However, new commits to a repository will trigger a scan.
Permissions
The GitHub app requires certain permission in order for our service to work:
-
Read access to metadata - This is a default permission to all GitHub apps, and does not leak any sensitive information
-
Read and write access to checks - Checks are also known as actions, which we create and update in order to inform users about the scan progress. It is also used for posting results and trigger events for the GitHub App
-
Read access to code - This is used in order for us to scan the dependency files. Note that we only read dependency files, not the source code
-
Write access to code - This is required to create pull-requests with fixes for the dependency files
-
Read and write access to pull-requests - This is also necessary for creating pull-requests
-
Read and write access to issues - This is for future capabilities of issue integration between Debricked and GitHub.
Configuration
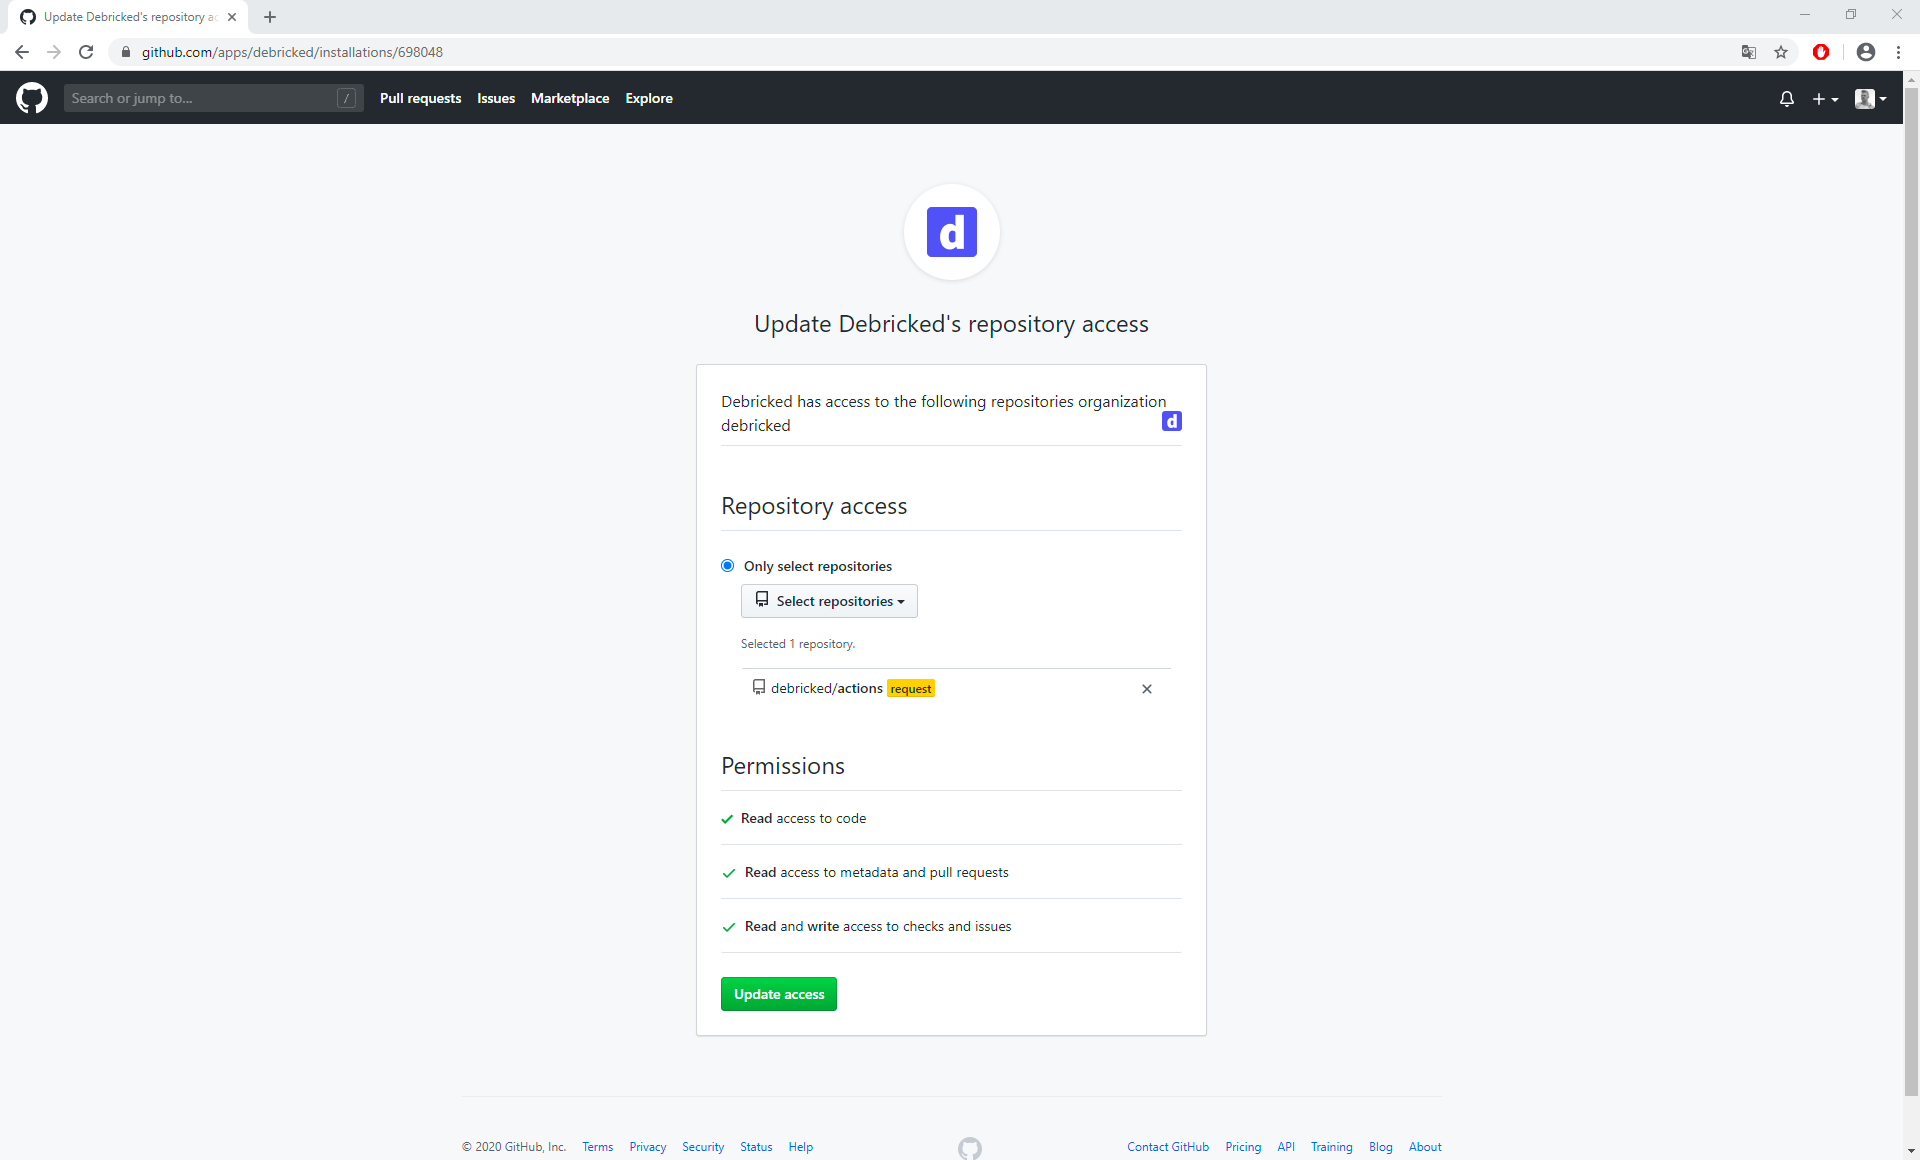
If you selected specific repositories upon installation, and would like to add more repos to be scanned:
- Click on Repositories in the left side menu
- Click on New
- Select Repository
- Follow the link to grant access to more repositories
The added repos will only show in the UI once a scan has been started by either:
- Starting a scan manually, by going to New -> Repository
- Pushing a commit, which will start the scan automatically
You can also go directly in to your GitHub account and edit the app configuration.
Enable/Disable app scanning
If you want to enable/disable scanning repositories via the GitHub App:
- Go to Repository Settings
- Toggle the GitHub App scanning switch to off
Disabling GitHub App scanning allows you to scan your repositories using a CI integration instead, while still keeping the app for opening Fix Pull Requests to the repository.
Configuring integration
It is possible to configure the GitHub integration by adding a .debricked.yaml file to the root of your repository, such as excluding directories and skipping adding the scan output to GitHub.
It can take up to an hour before the configuration changes take effect. Our GitHub actions alternative does not have this limitation.
Enabling slow scan
In cases where you get the “Your repository seems to be too large” error, you may want to enable slow scan to make the scan pass. To do so:
- Create or edit the .debricked.yaml in the root of your repository
- Set slow_scan to true:
slow_scan: true- Commit
Excluding directories
Another solution to resolve the “Your repository seems to be too large” error is to exclude some directories in order to make the scan pass. To do so:
- Create or edit the .debricked.yaml in the root of your repository
- Put the directories you want to exclude in the file:
excluded_directories: ['large-directory', 'important-directory/unwanted-directory', 'another-directory']- Commit
Enable skip scan
In order to prevent your pipeline from breaking due to vulnerabilities (or if you have a very complex project where the scan time is too long for your needs) you may want to enable the skip scan. This means that we still scan your repositories, but the pipeline won't wait for the results. To skip adding scan output to GitHub:
- Create or edit the .debricked.yaml in the root of your repository
- Set skip_scan to true, like so:
skip_scan: true- Commit
Uninstallation
If there is a problem during installation of the app, you can uninstall the app:
- In GitHub, go to your GitHub user settings
- If the app was installed on an organizational account, switch to that account
- Under Account settings click Applications
- Find Debricked's app in the list, and hit Configure
- At the bottom of the page, click on Uninstall
To re-install the app, follow the installation guide or set up GitHub actions.
If you are uninstalling the app due to unmet expectations or other issues, please let us know at support@debricked.com.